Step by Step Guide
Step 1: Open Settings
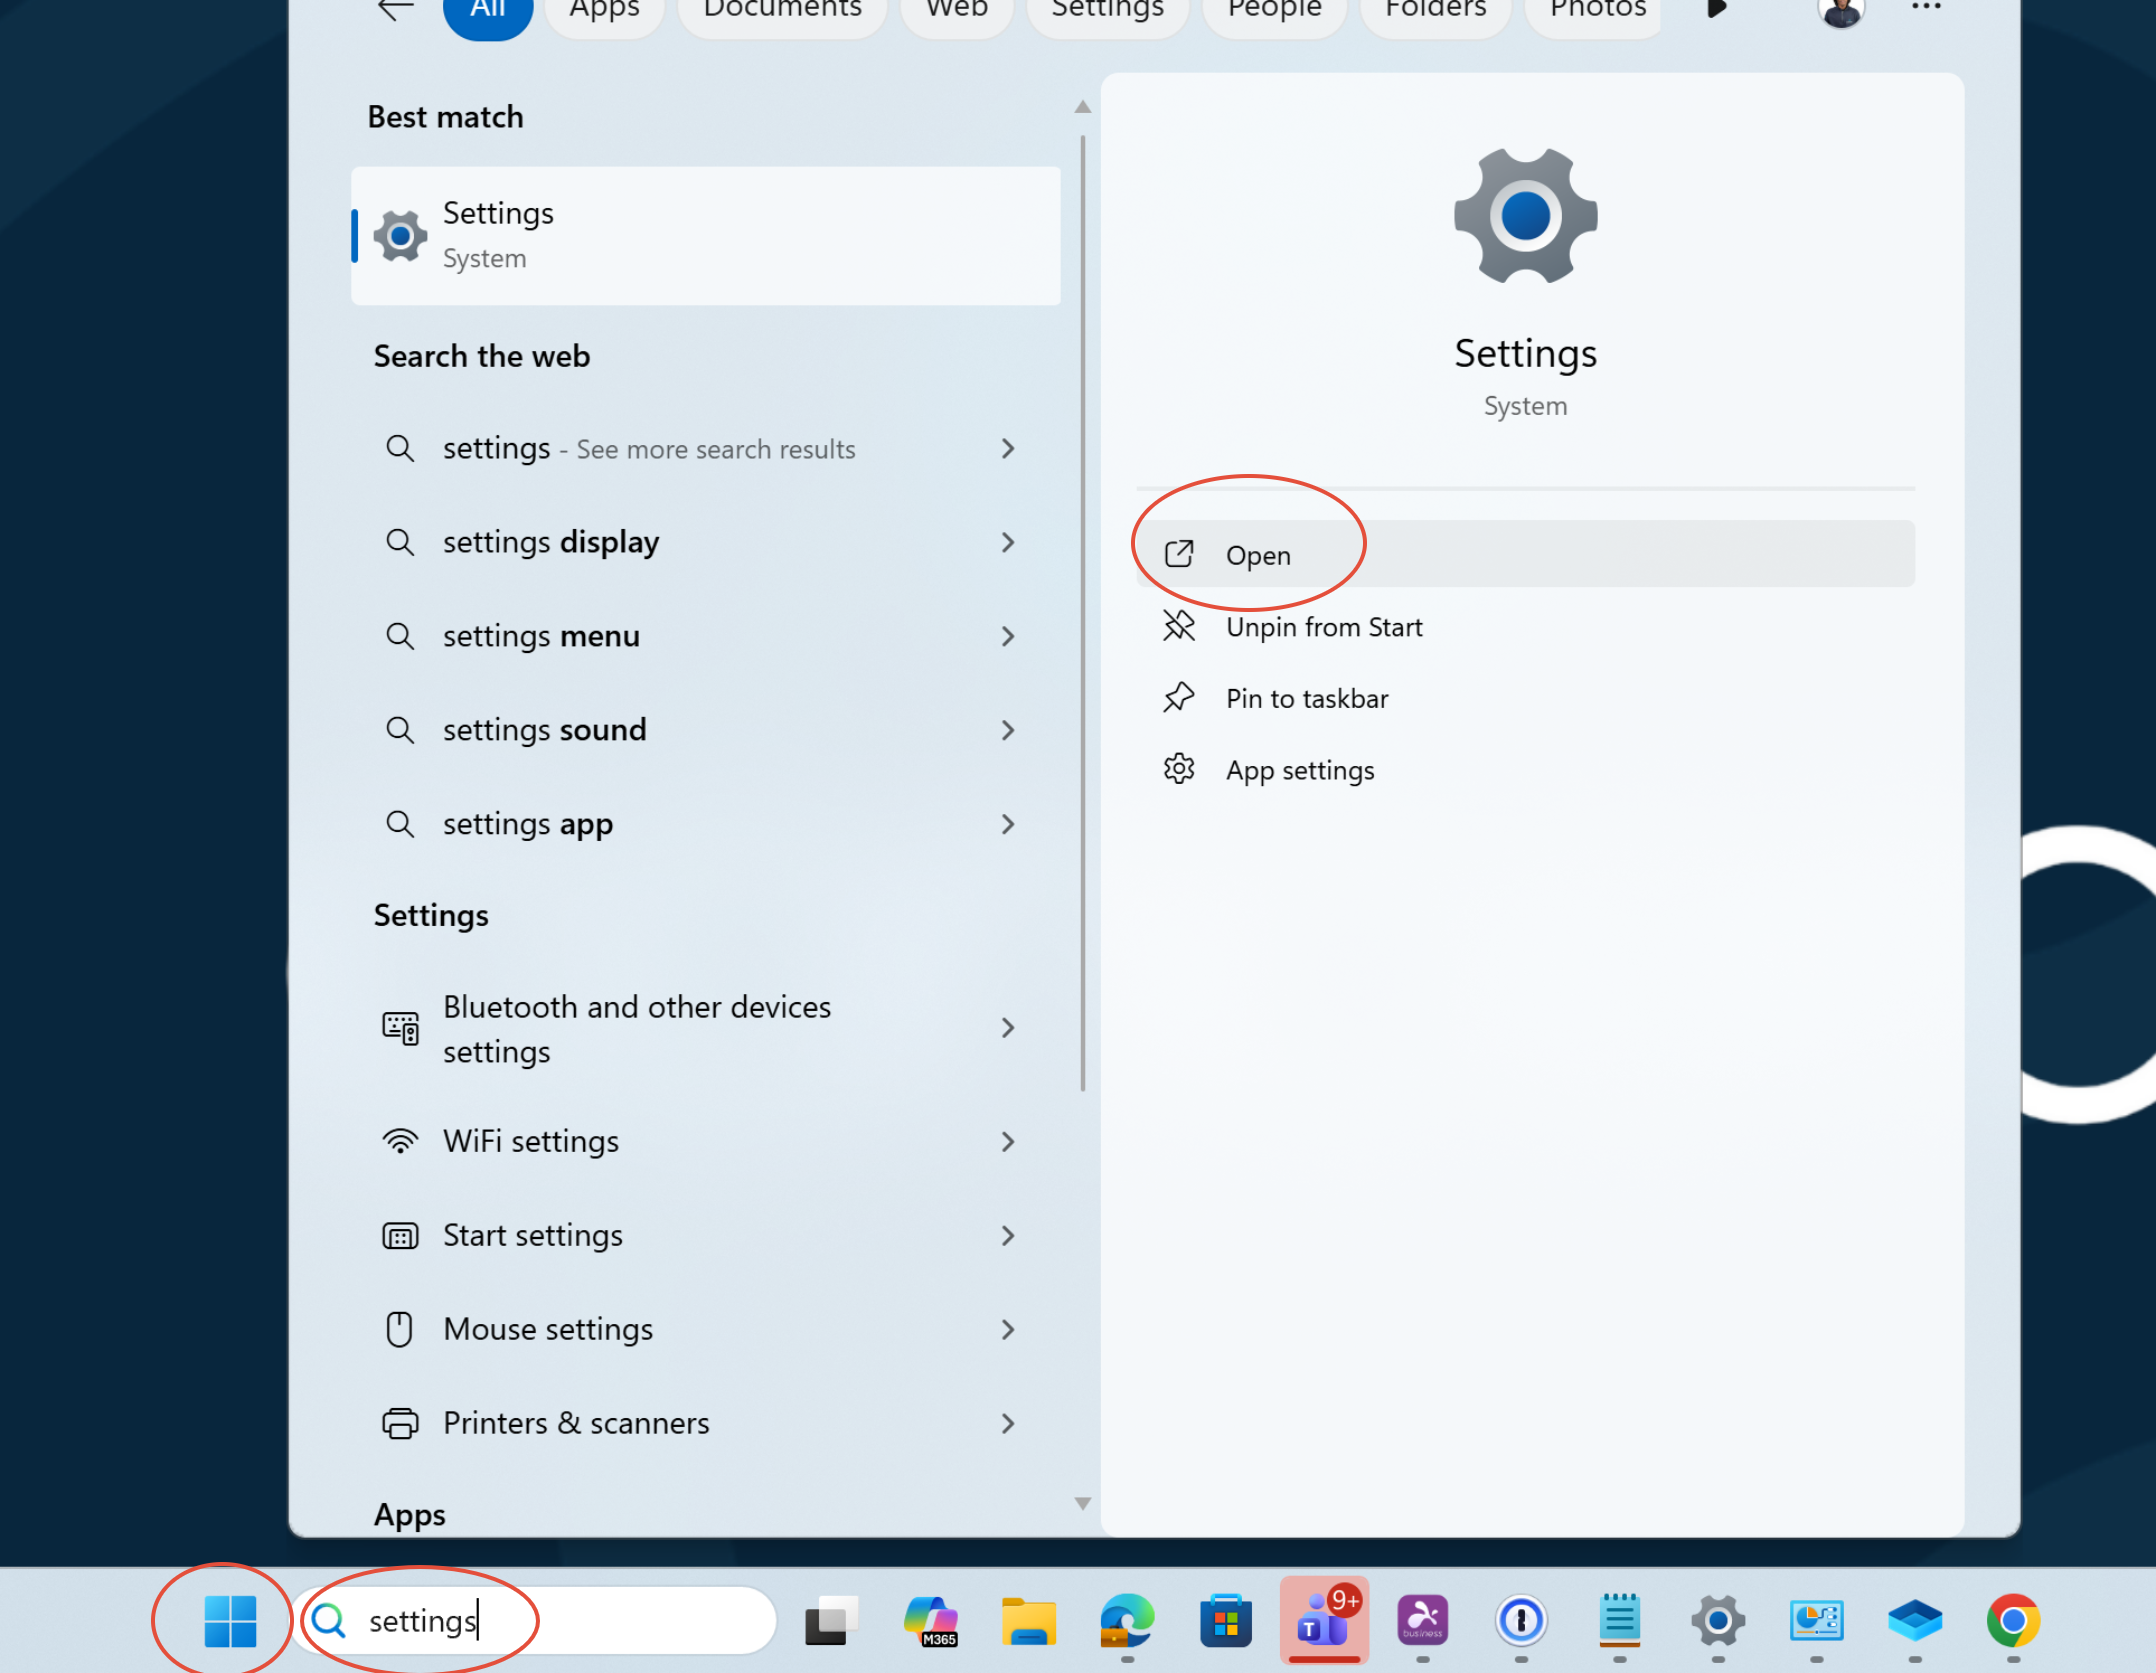
- Select the windows icon and type settings then open settings or you can type settings in the search bar on the taskbar without selecting the windows icon.
Step 2: Select Printers & Scanners
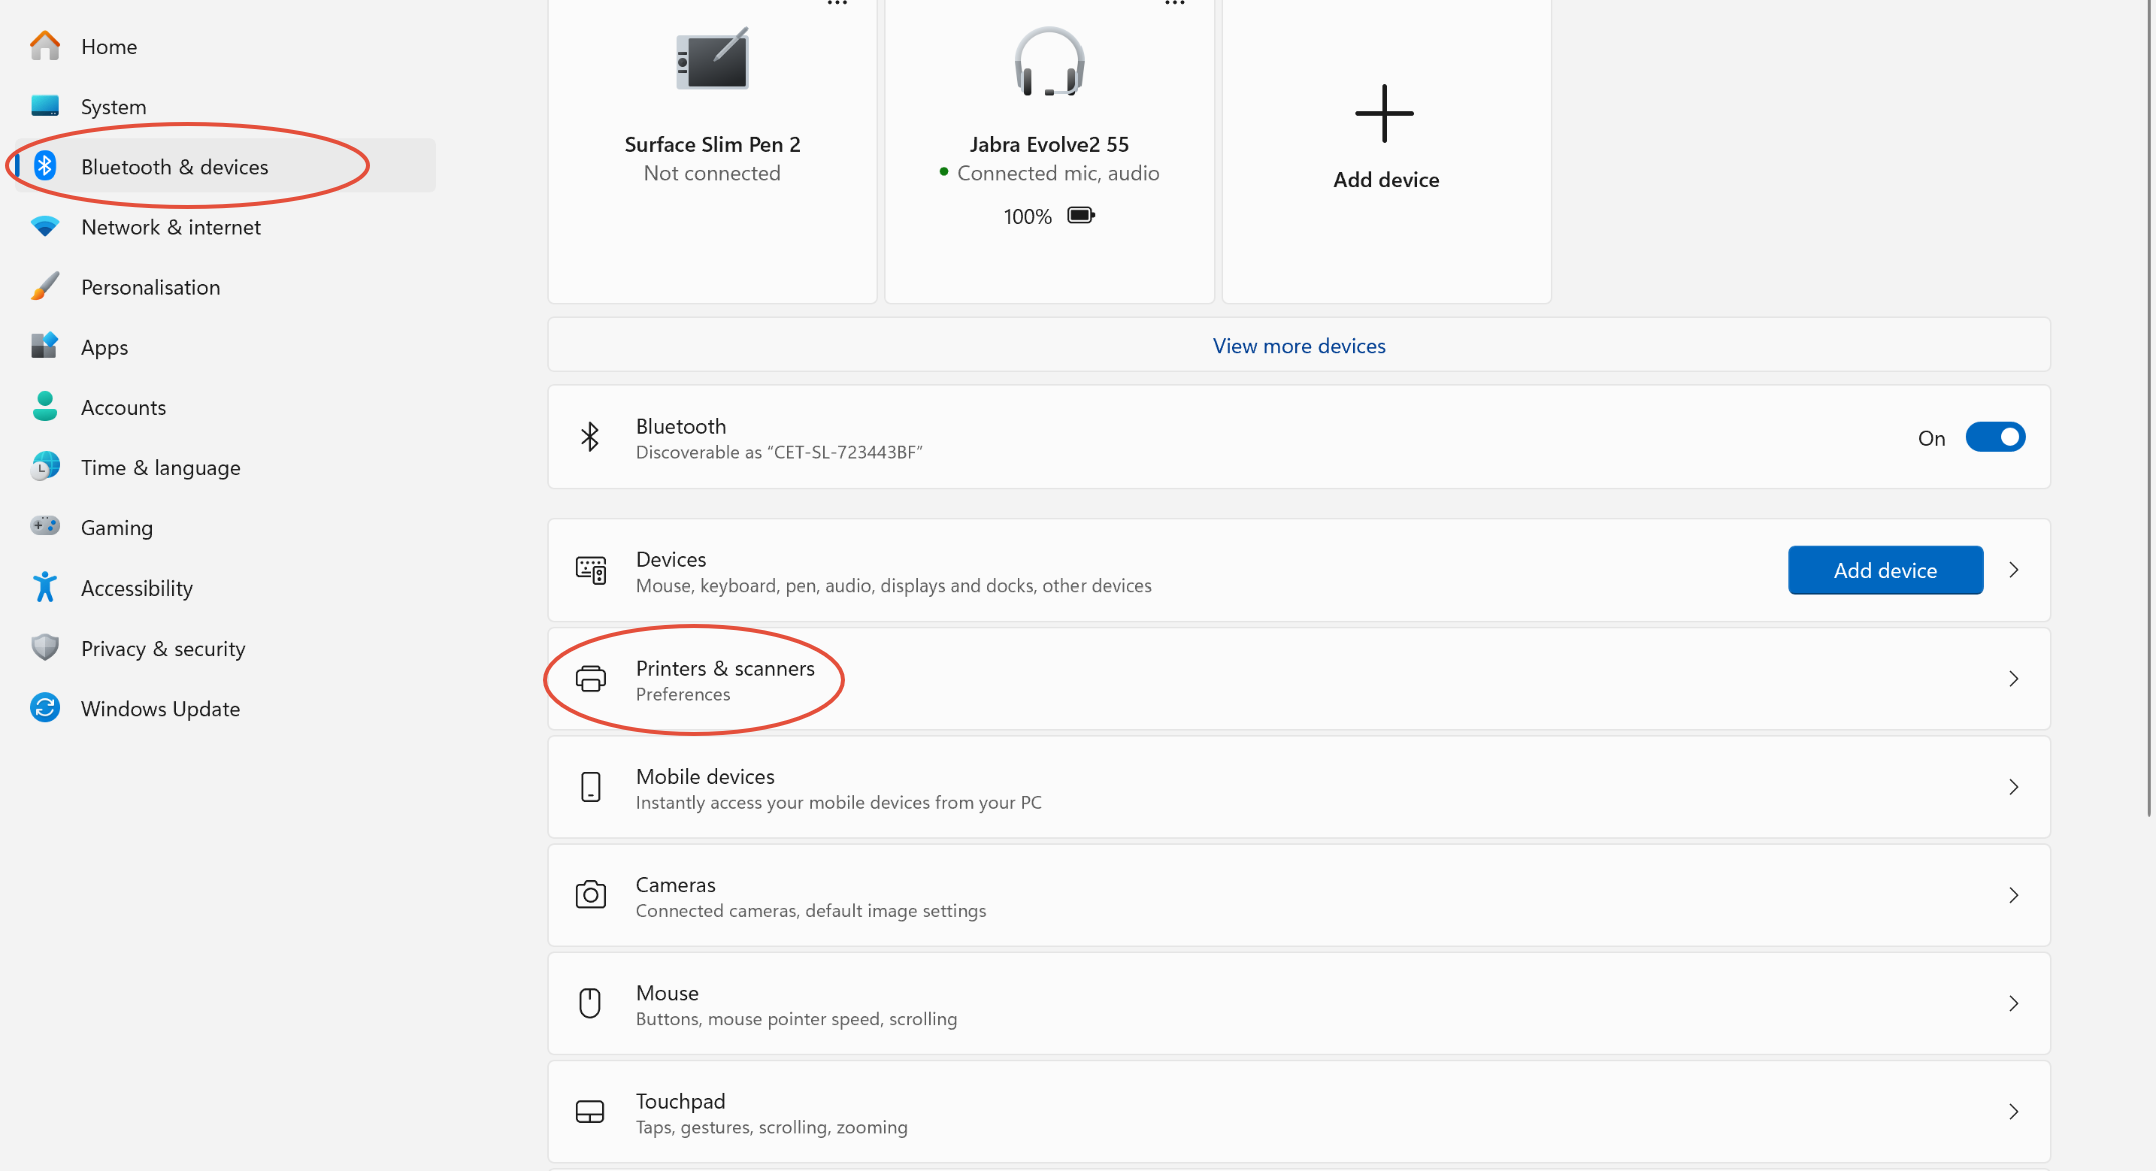
- Once settings has opened on the left hand side you will see the Bluetooth & Devices Option, please select the option then select printers and scanners.
Step 3: Select a Printer or Scanner ( The one you want to set as default )
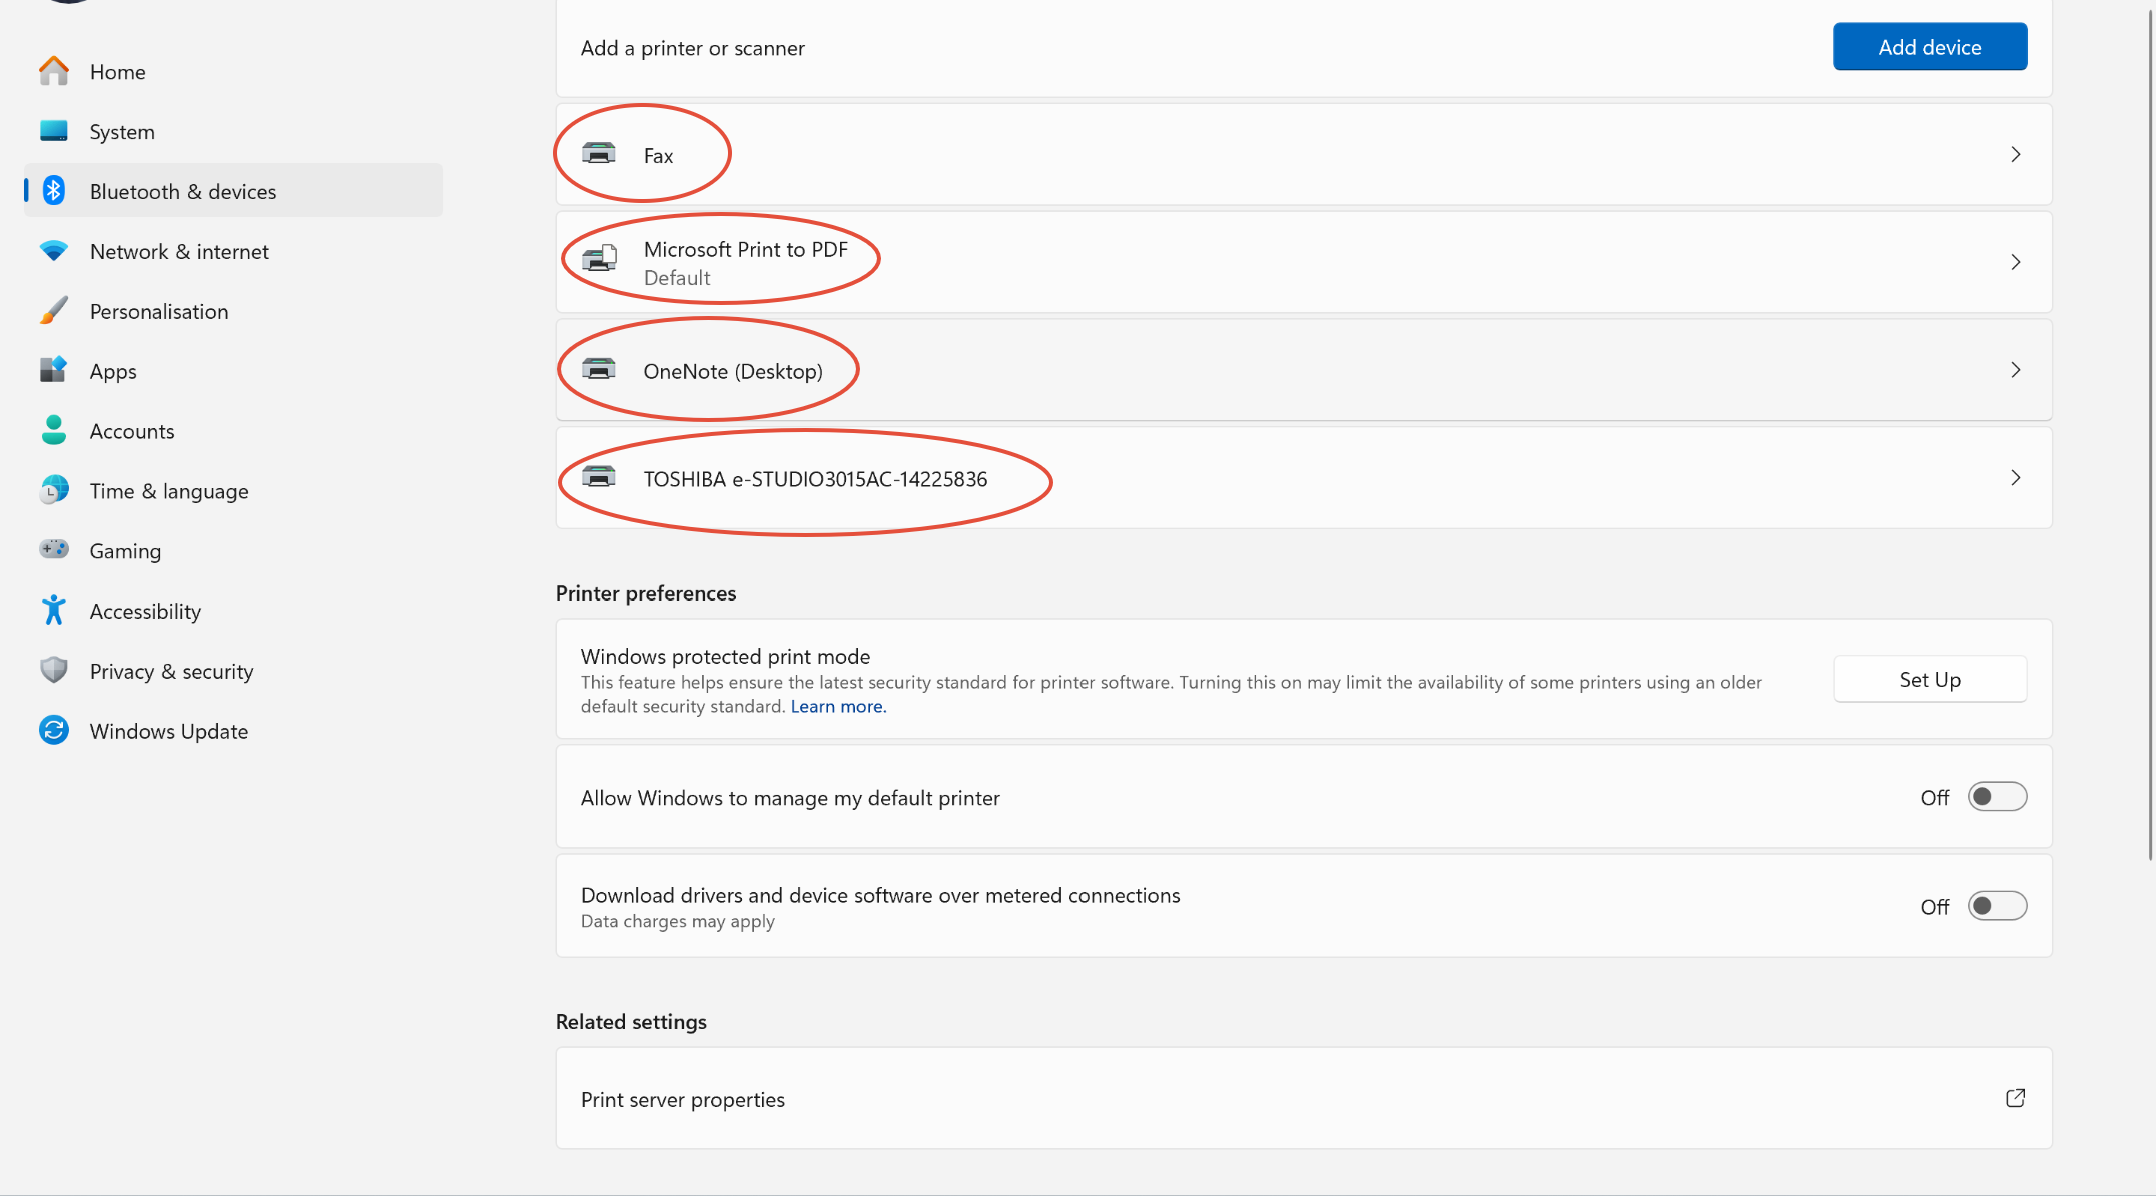
- Here it shows the printers and scanners this is where select the printer or scanner you would like to set as default.
Step 4: Set the printer or scanner as default
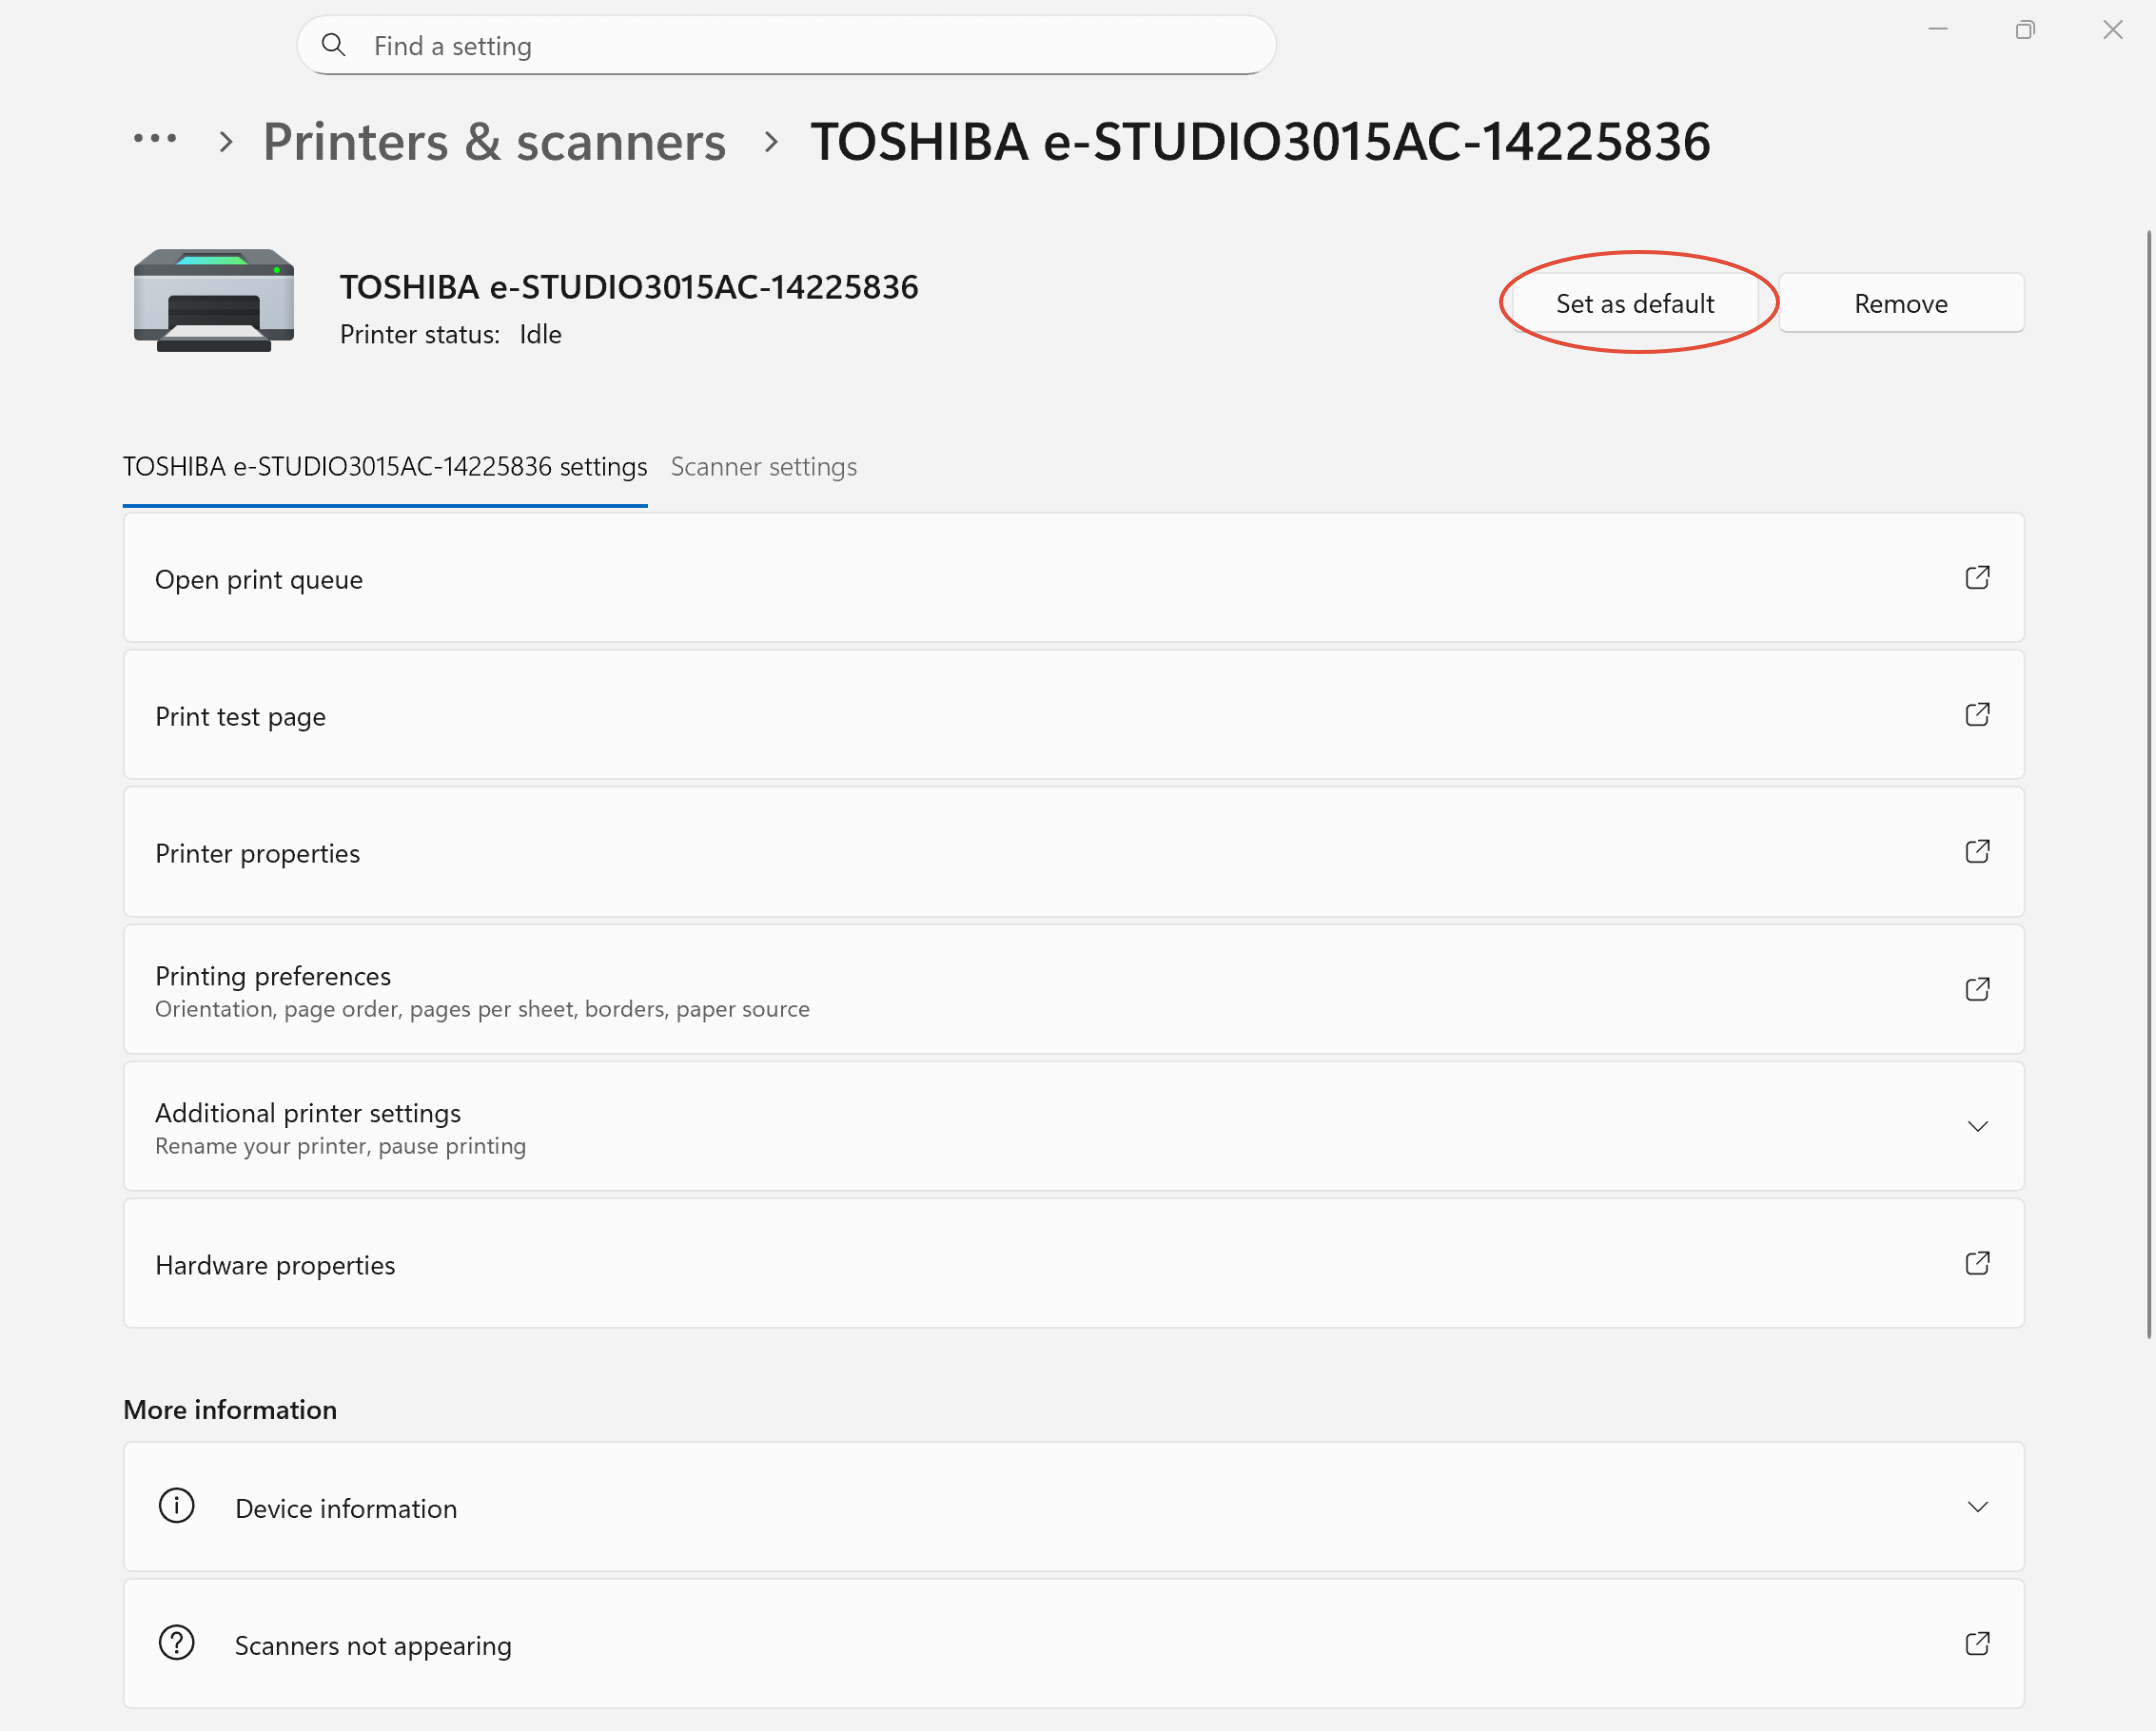
- This is where you can set the printer or scanner as default, you would select set as default and this is found next to the remove button.
Was this article helpful?
That’s Great!
Thank you for your feedback
Sorry! We couldn't be helpful
Thank you for your feedback
Feedback sent
We appreciate your effort and will try to fix the article